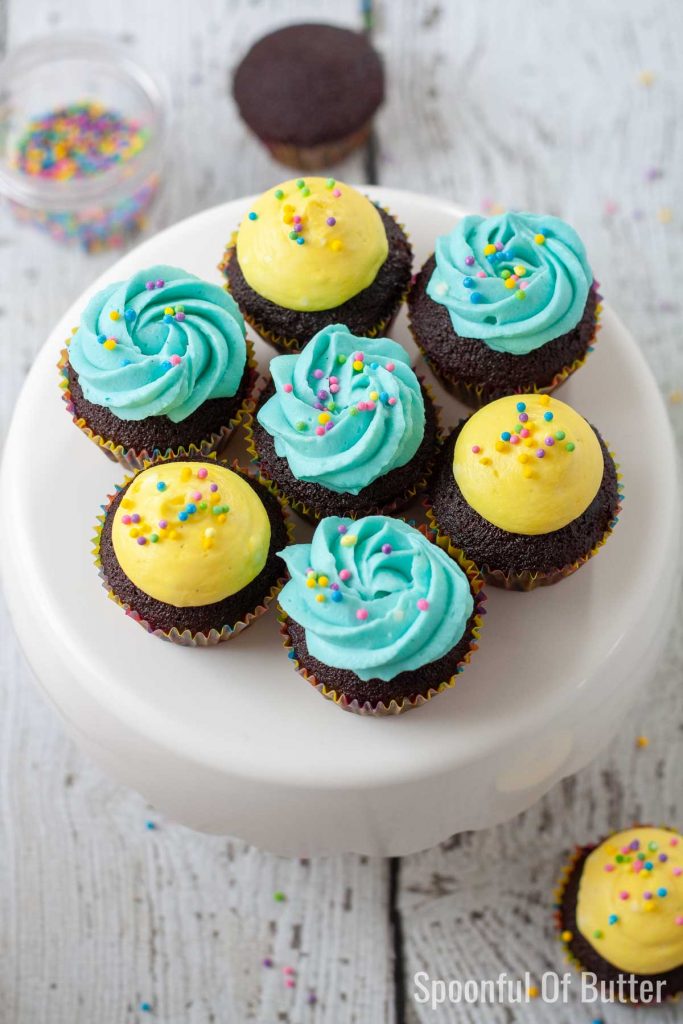
The intense chocolate flavor of these cute, mini chocolate cupcakes pairs well with the smooth and tangy cream cheese-whipped cream frosting. The cream cheese-whipped cream frosting is so easy to make and requires ingredients straight from the fridge (which means you can make this frosting anytime – no need to worry about taking the ingredients out ahead to come to room temp…Yay!) It is very easy to customize these cupcakes according to your occasion by simply changing the color of the frosting, sprinkles, and toppings.
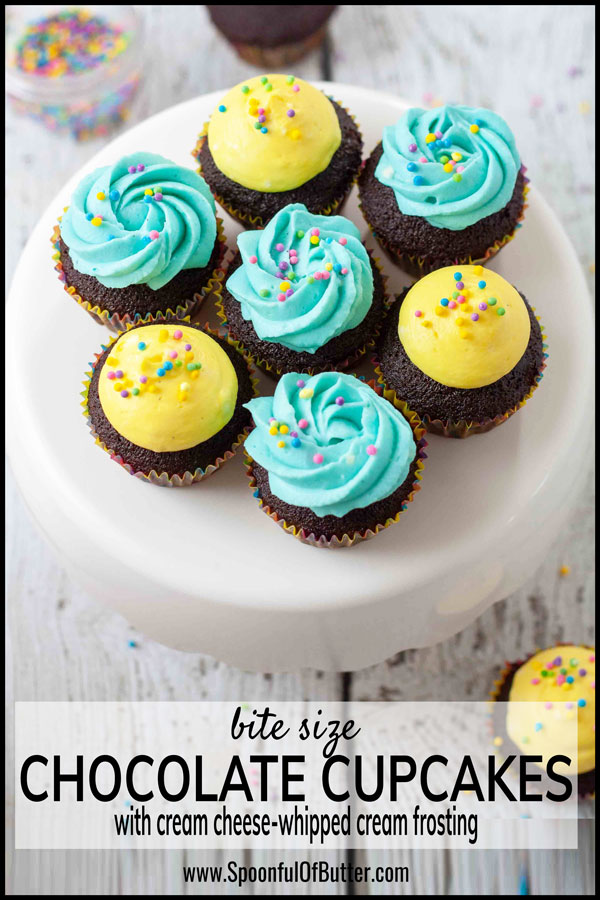

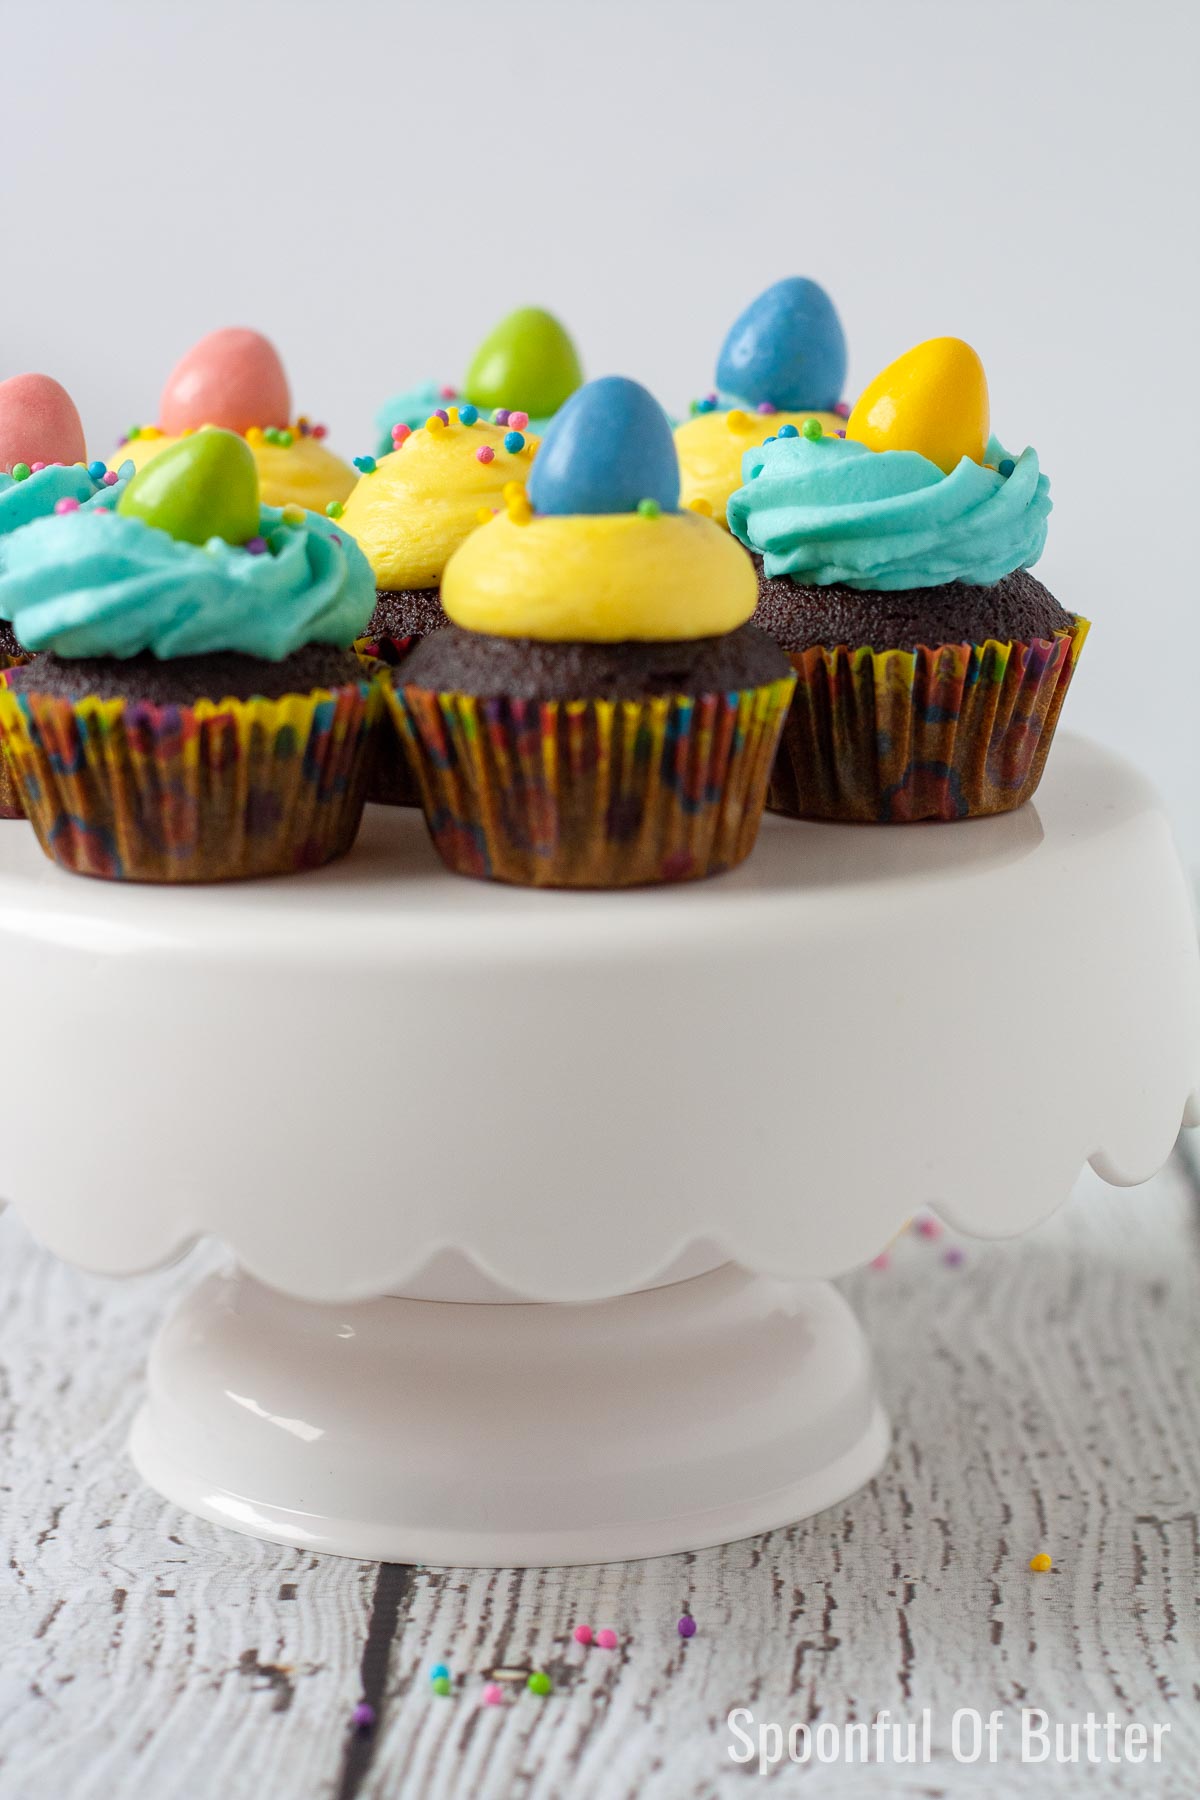
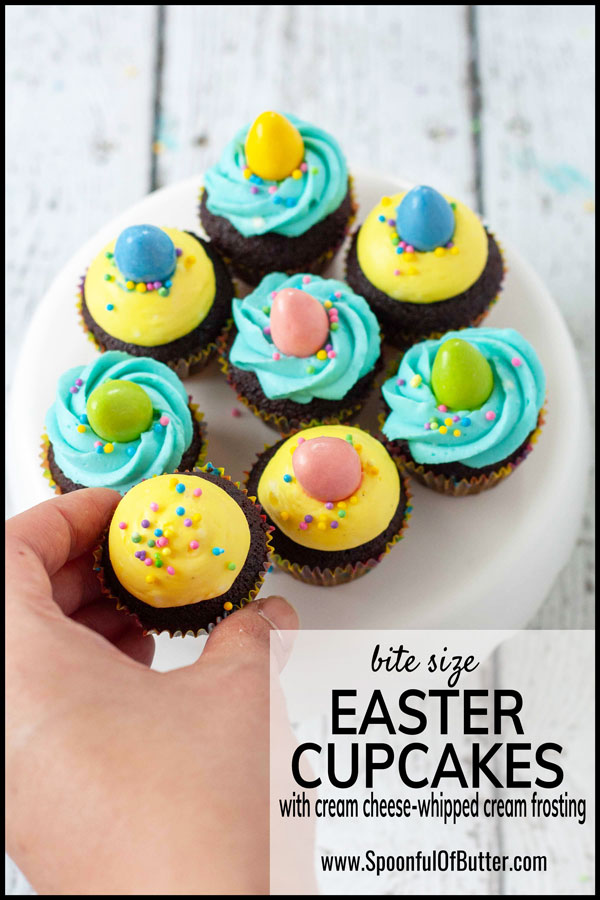
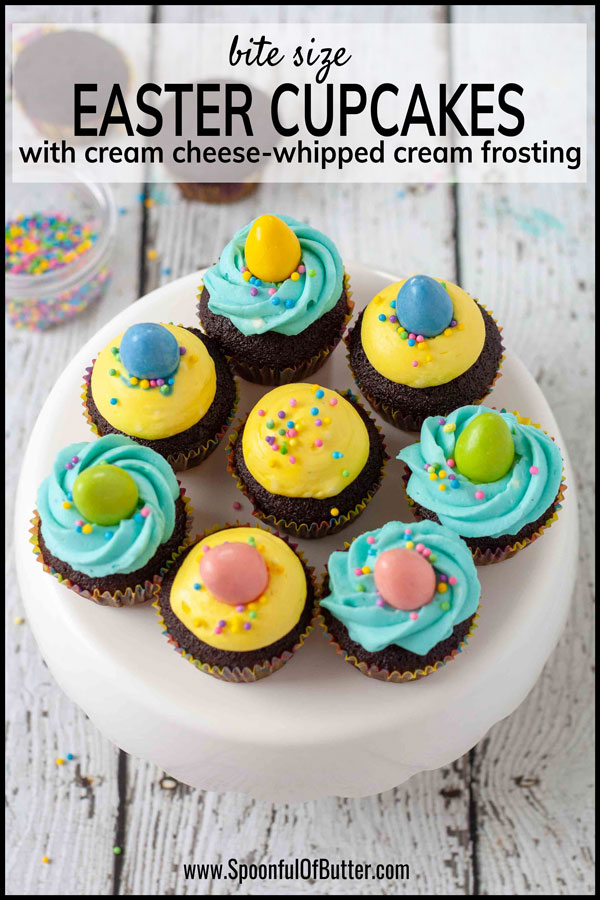
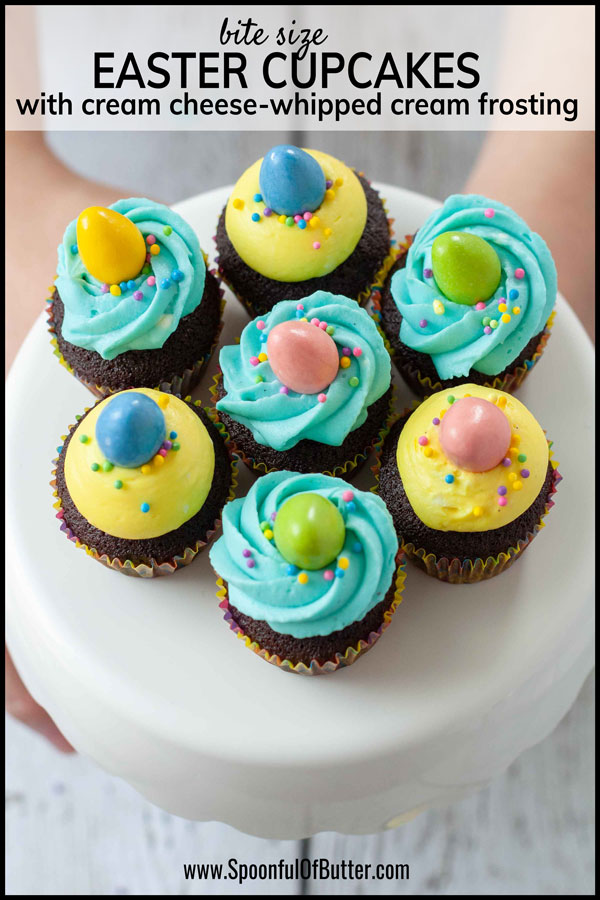
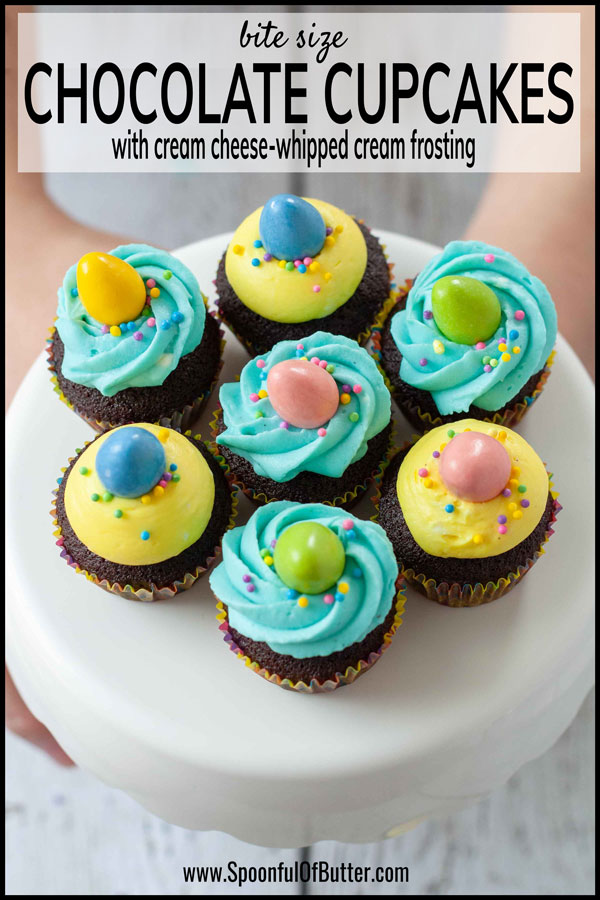
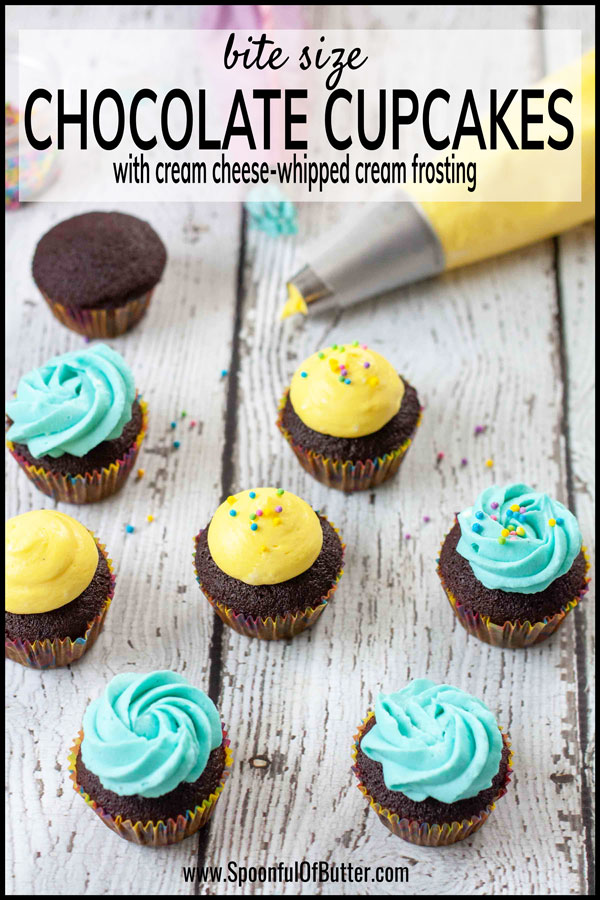
Did you know that chocolate and cream cheese actually taste good together? These bite-size chocolate cupcakes topped with my favorite cream cheese-whipped cream frosting taste as good as it looks!
As of writing, this is my most favorite basic chocolate cupcake recipe. Me, my husband, and daughter love to eat this while still warm, fresh from the oven, without any frosting. It has a deep chocolate flavor due to the dark cocoa powder that was melted in boiling water and definitely not too sweet. It also uses a combination of butter and oil for fat so you both get the great taste of butter and the extra moist from the oil. I wish I could take credit for the chocolate cupcake base recipe but it is adapted from Rose Levy Beranbaum’s Baking Basics book.
I’ve paired these chocolate cupcakes with different buttercreams but for me, they go very well with the cream cheese-whipped cream frosting. I was not a fan of cream cheese frosting until I discovered that when you add whipped cream, it mellows the richness of the cream cheese and gives you a smooth and creamy texture, and a rich, sweet, and slightly tangy taste. Really, a perfect match to these deep, dark chocolate cupcakes!
With a 5-month-old baby, the simpler the better is my mantra these days. This frosting is a winner because I don’t need to take out any ingredient to leave to room temperature. I can do it anytime as it requires a cold heavy cream and a cold cream cheese!
Customize to any occasion or holiday
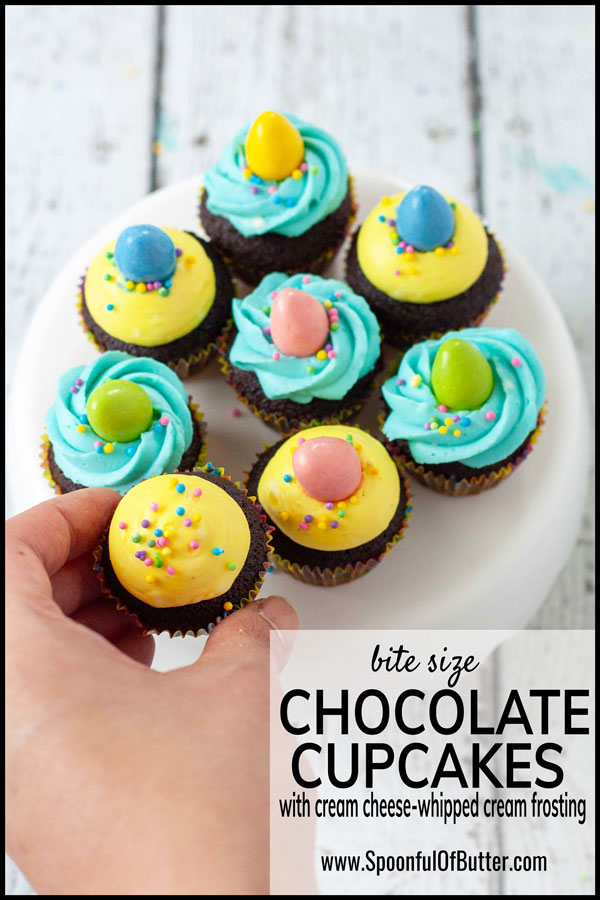
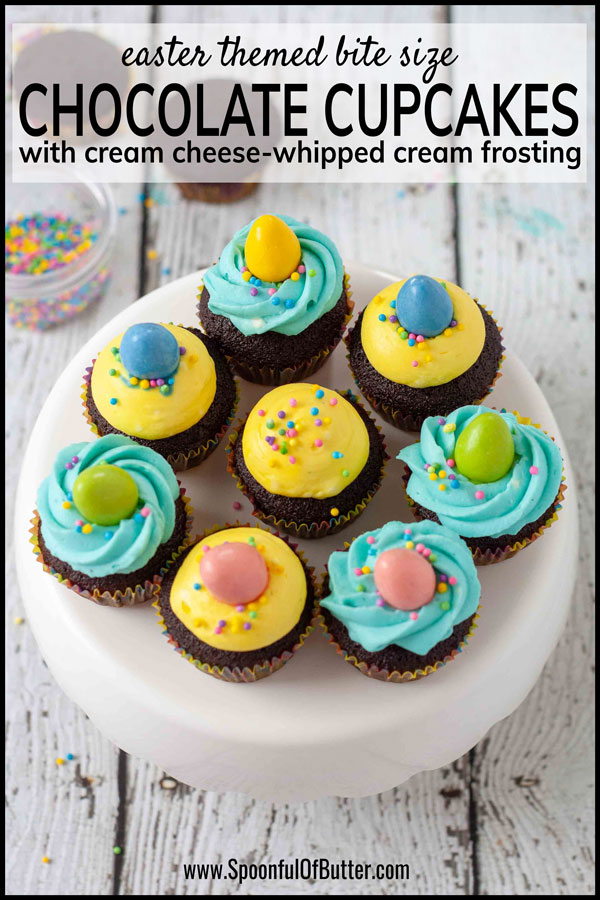
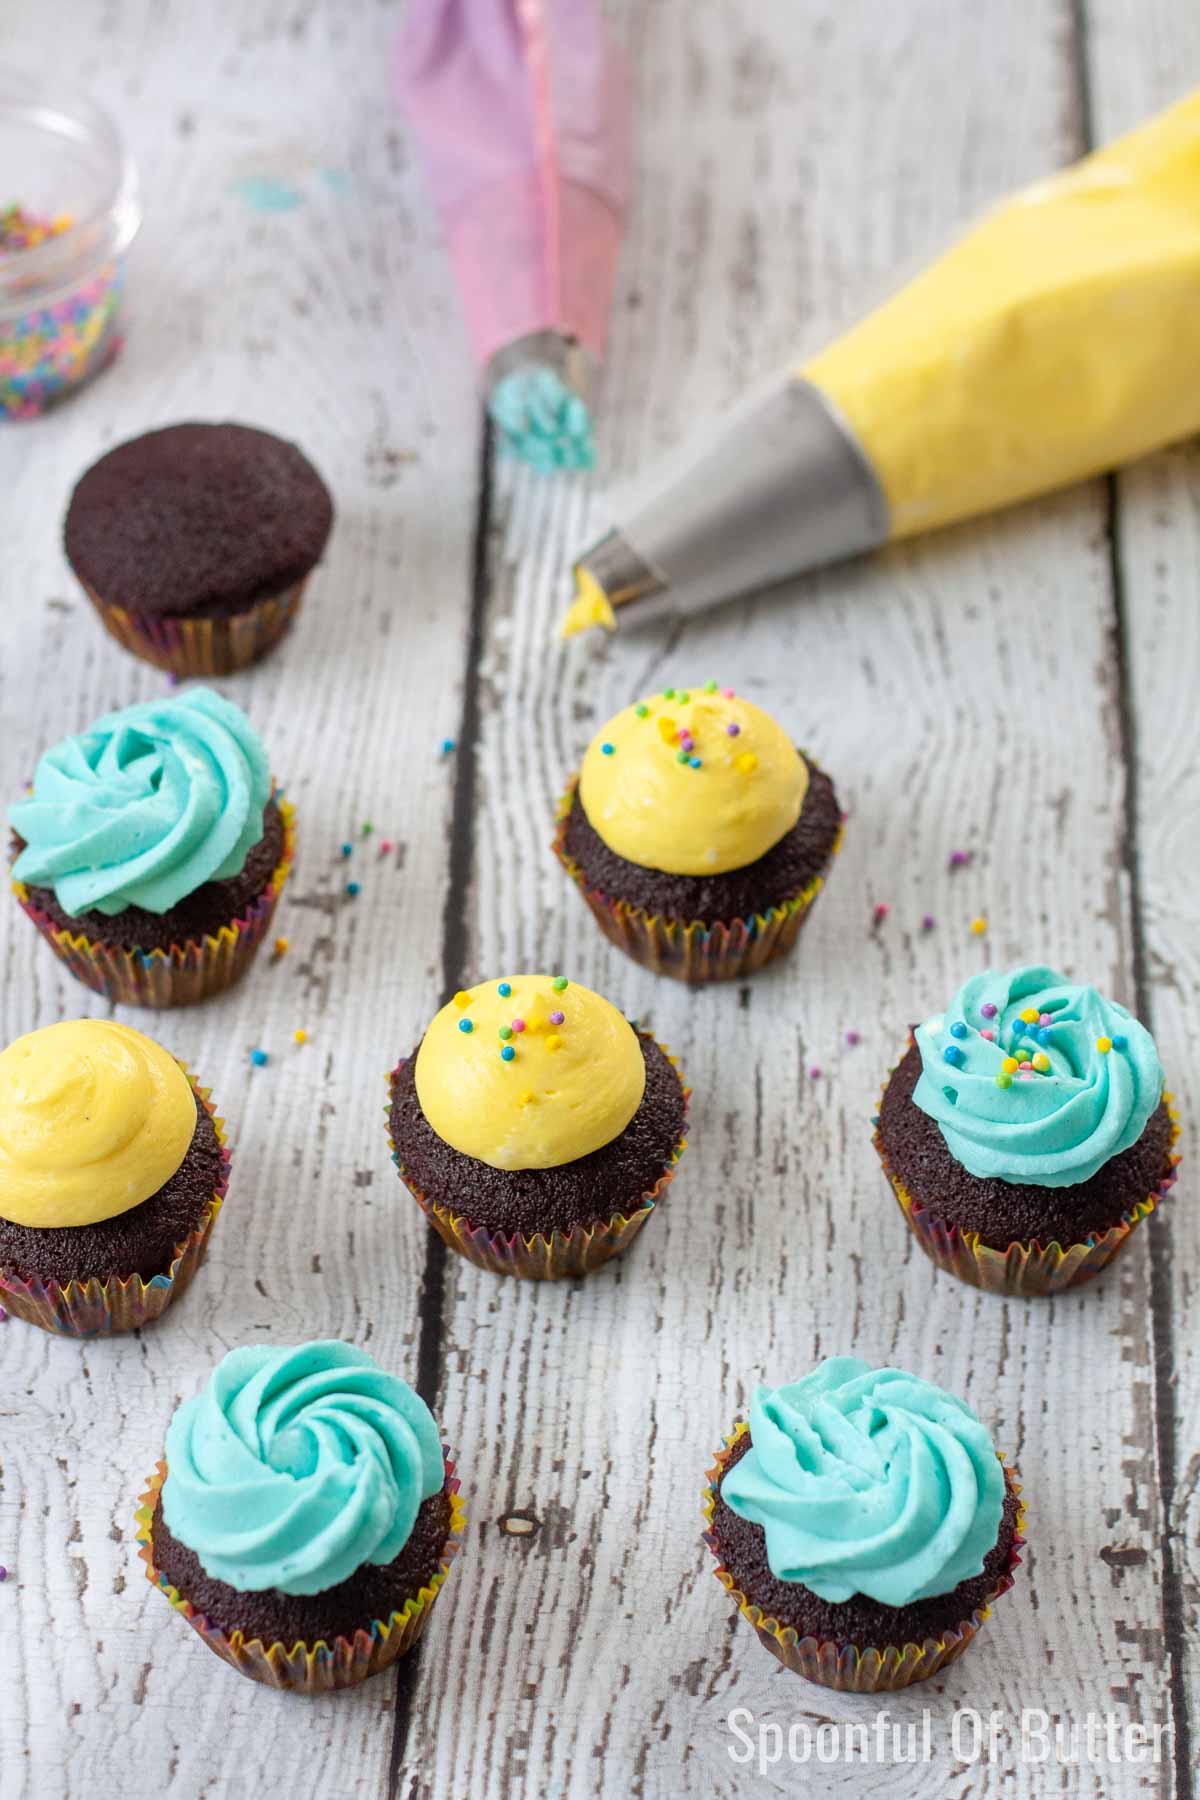
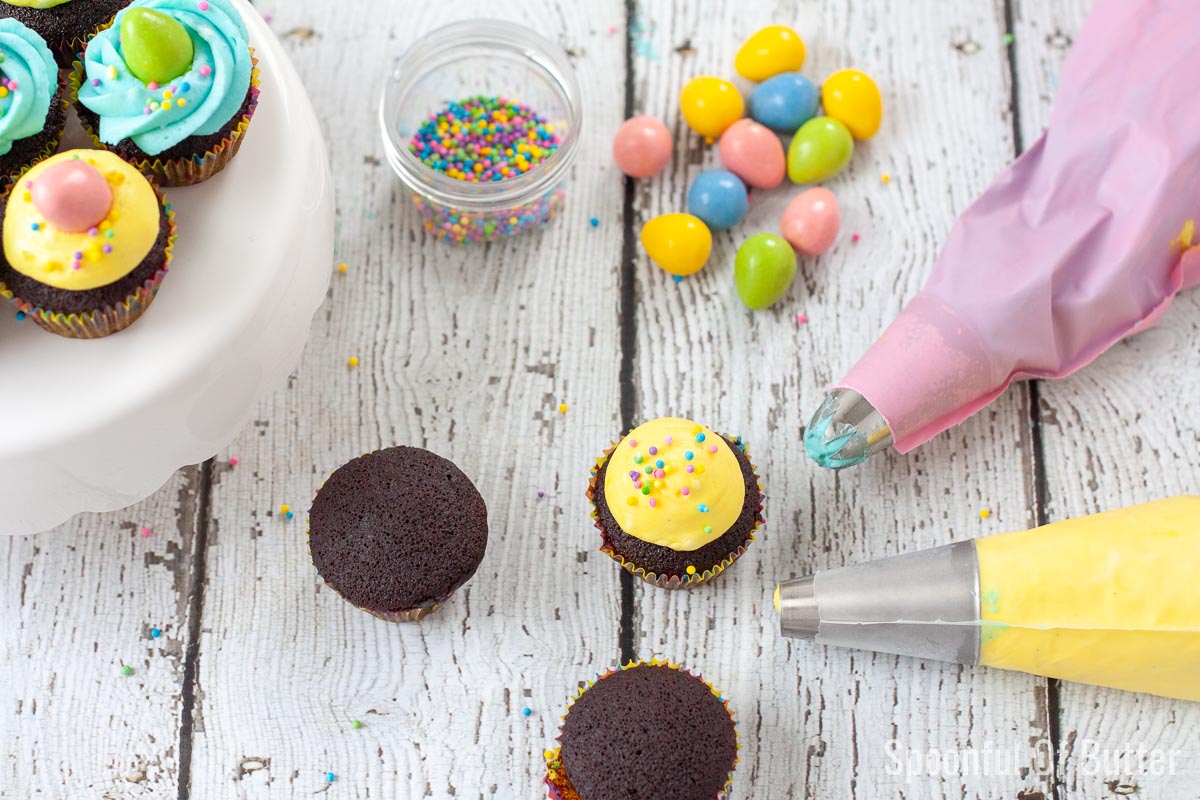
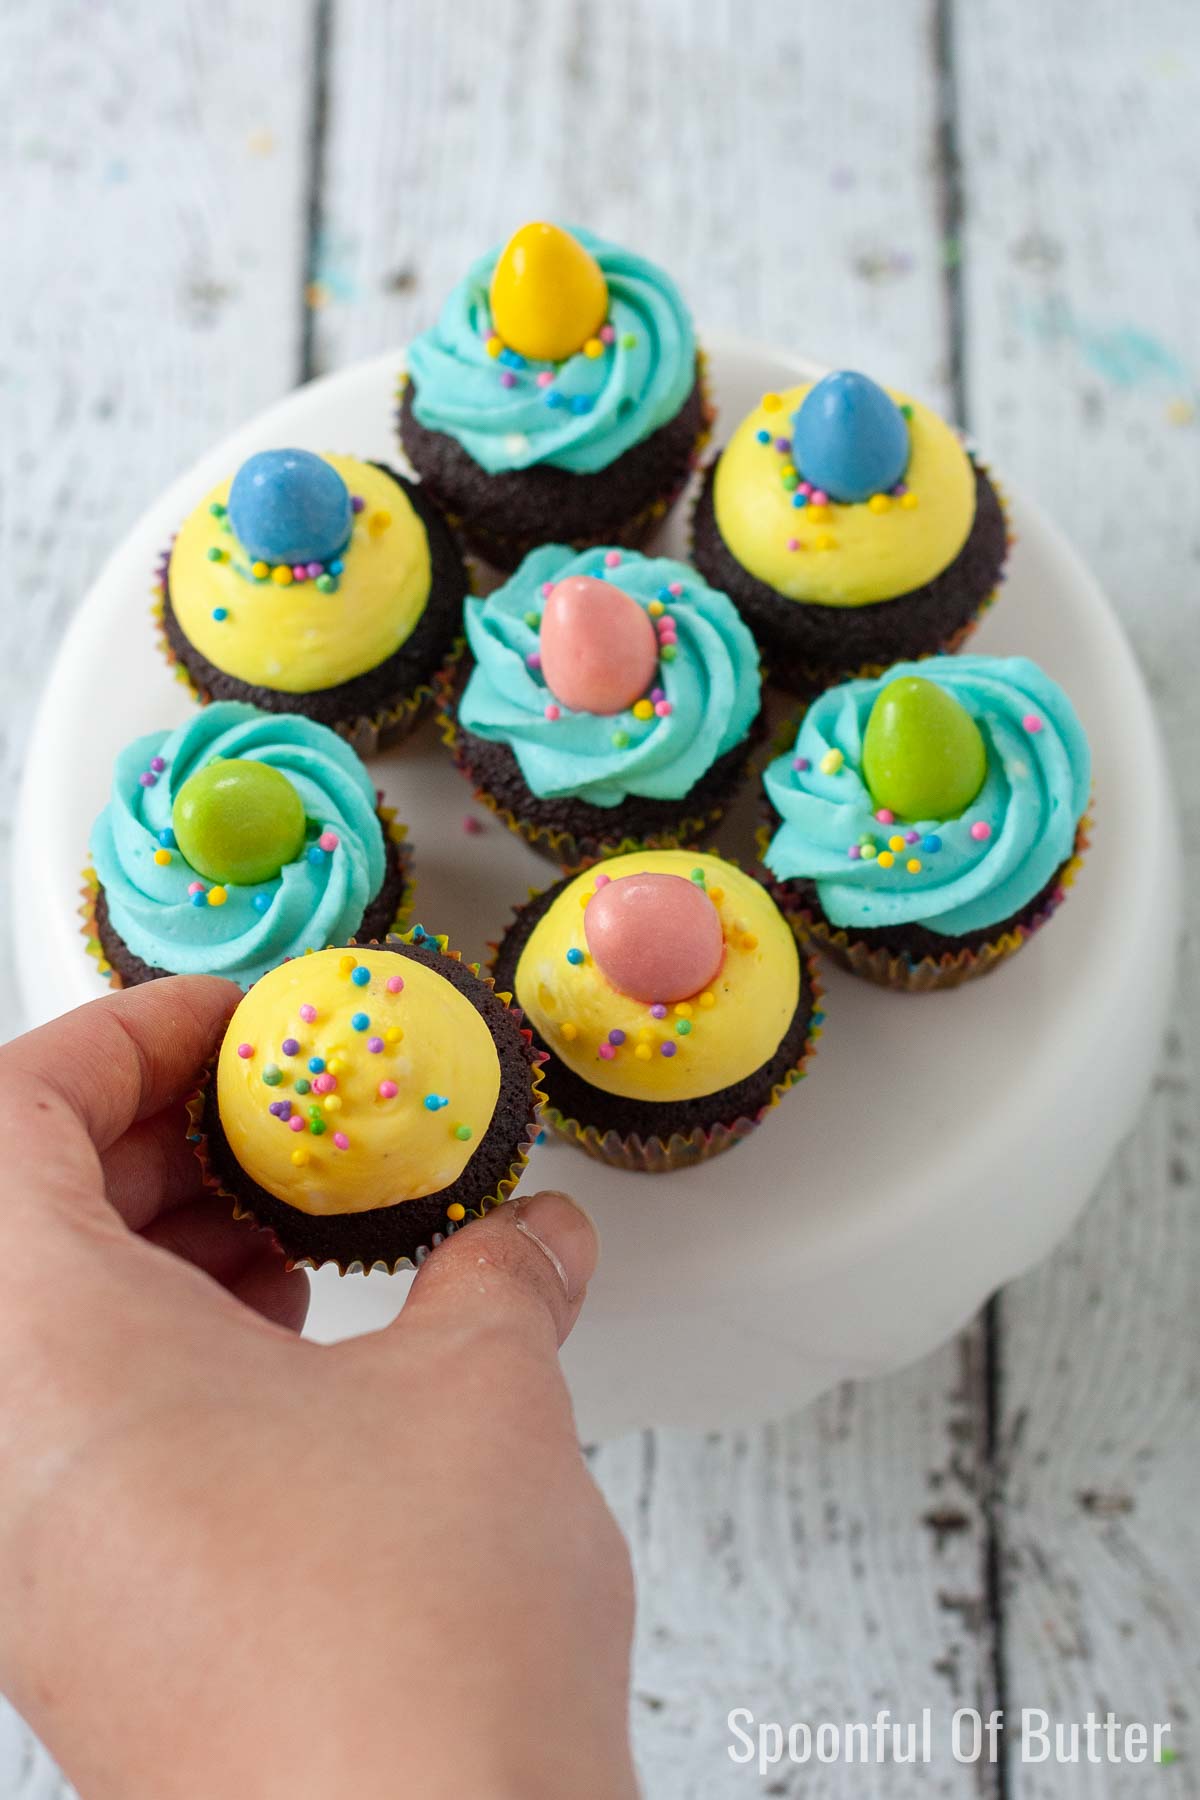
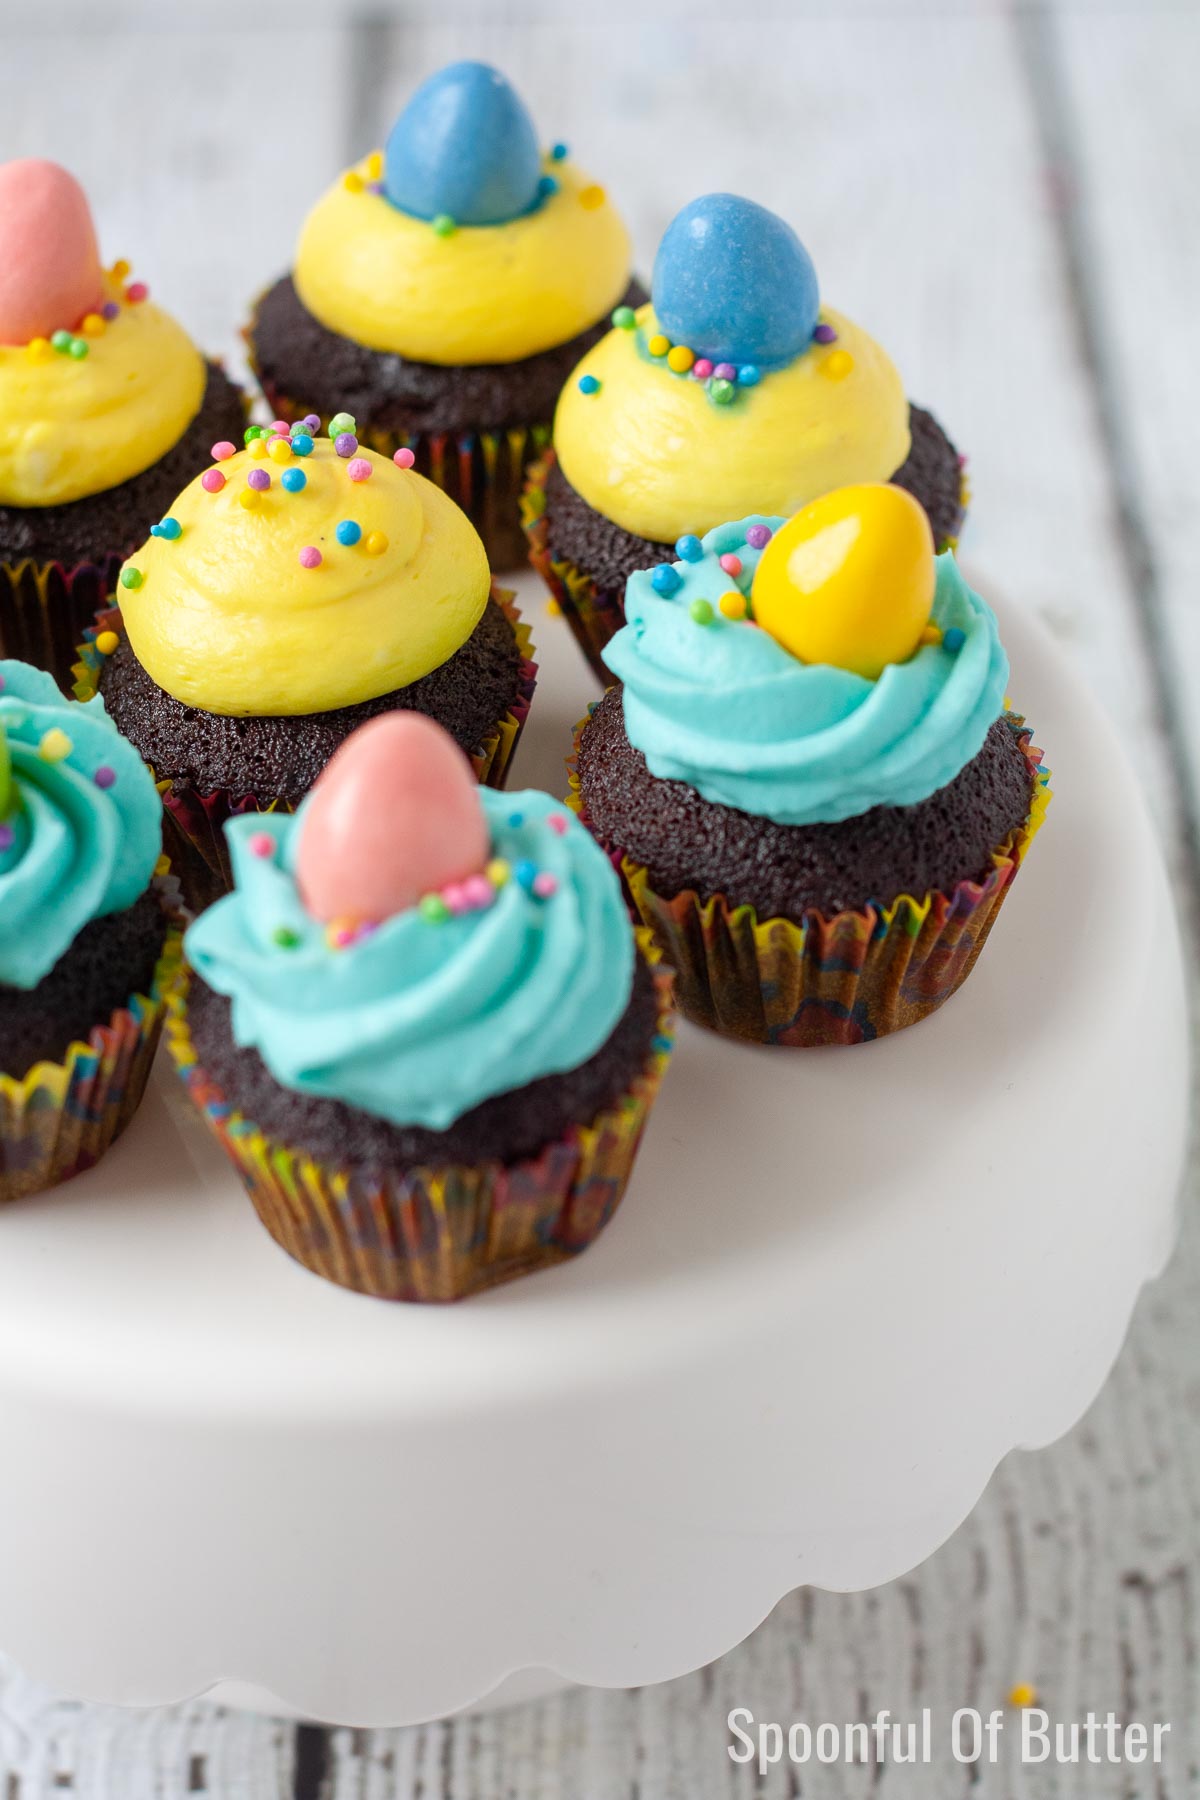
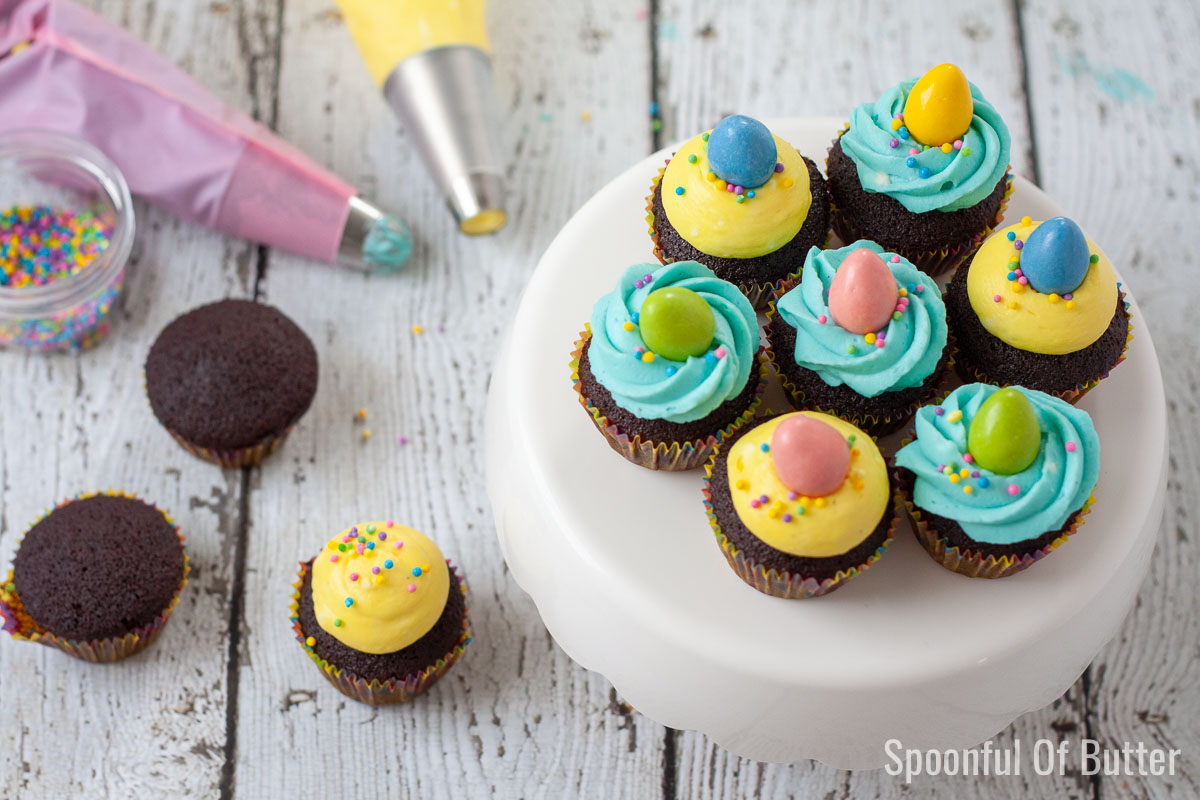
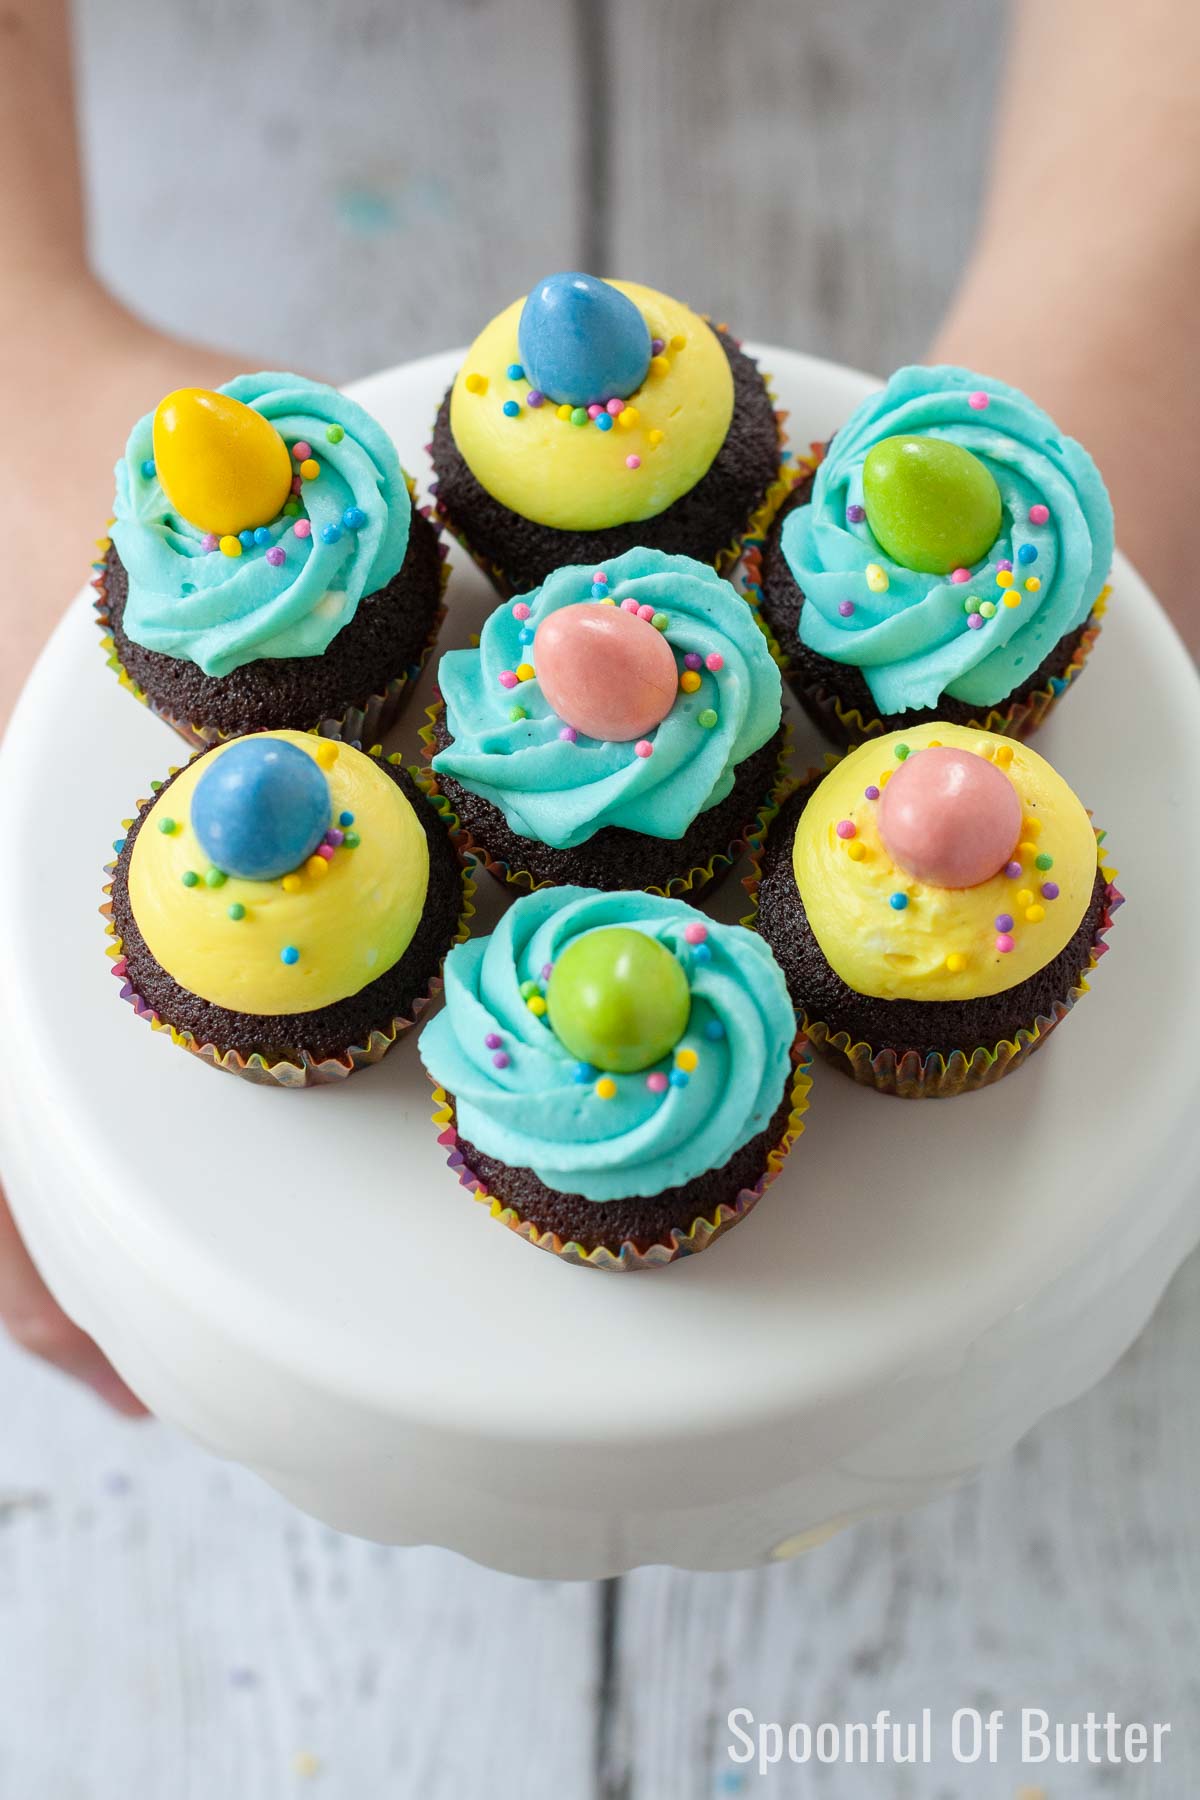
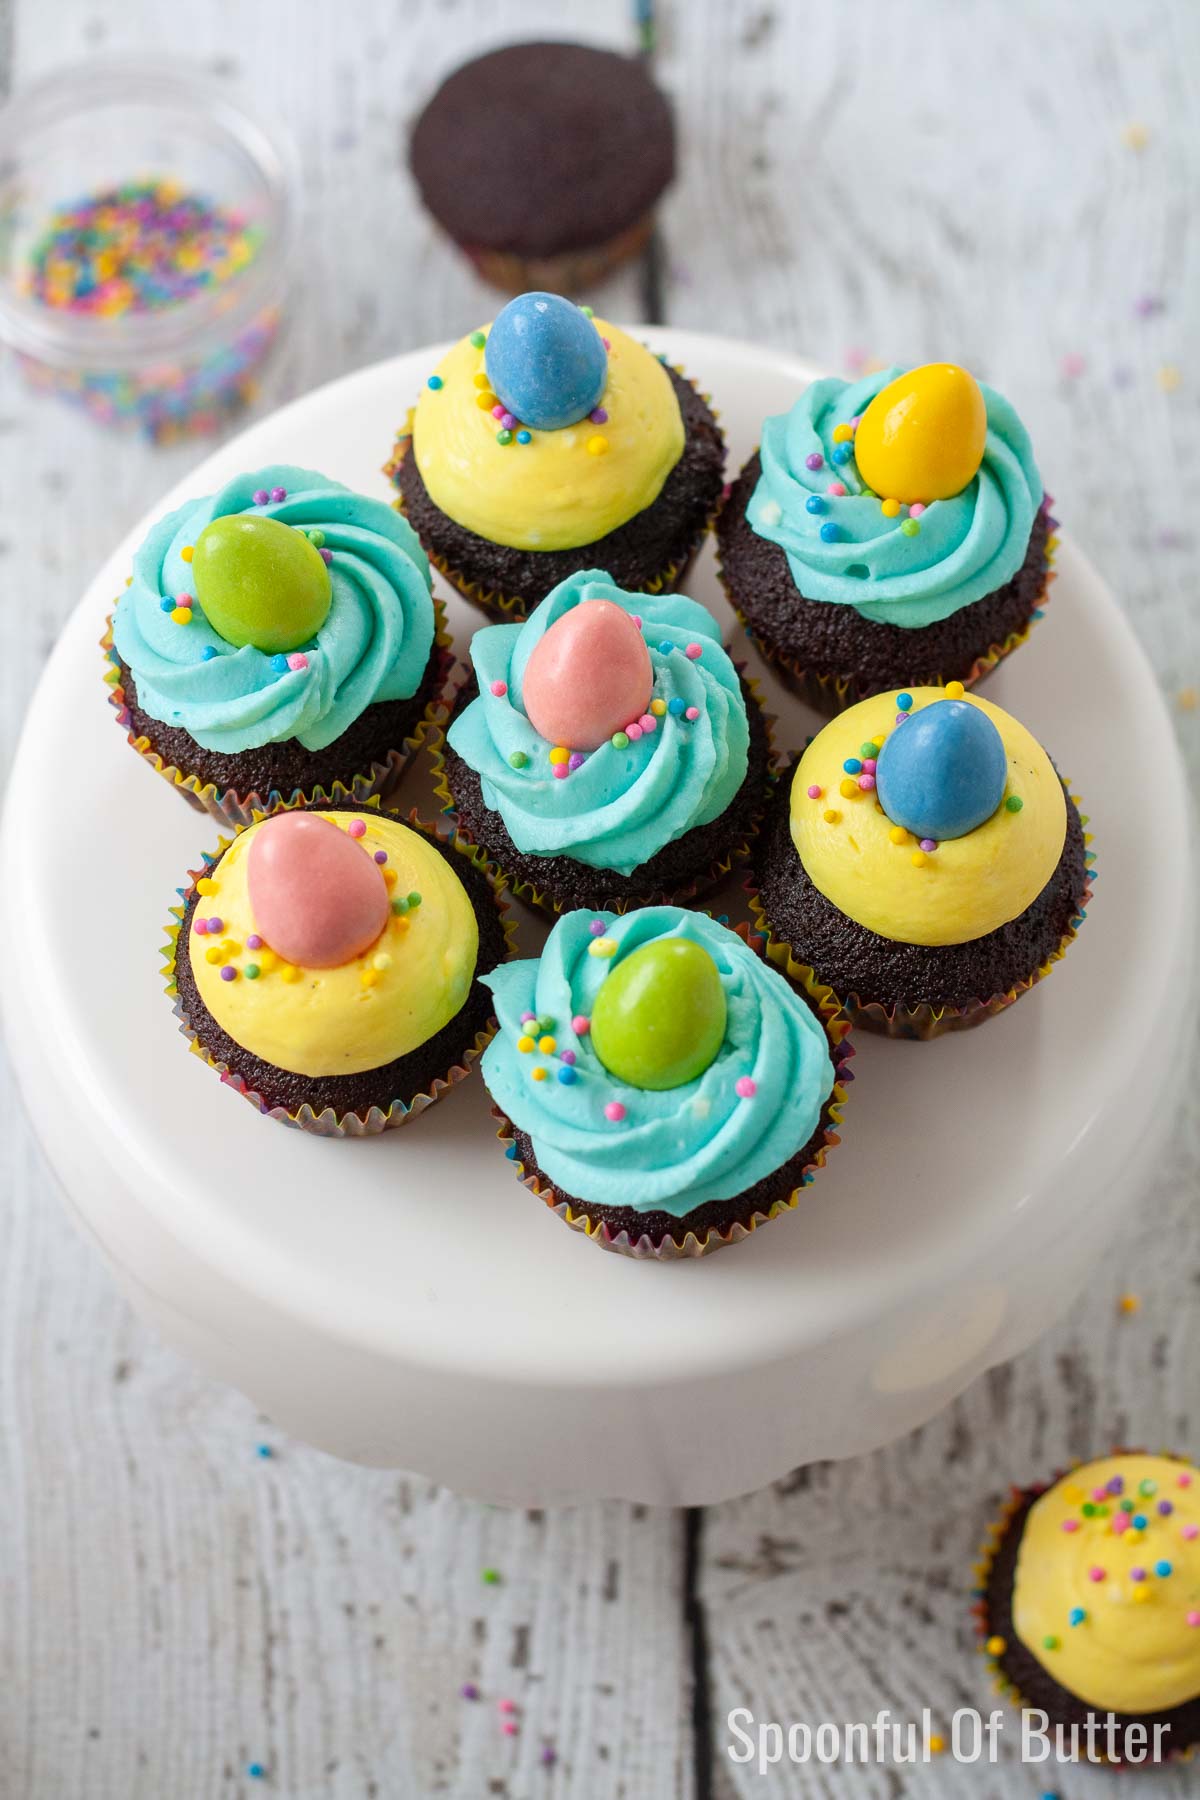
I decorated these cupcakes with pastel-colored sprinkles and eggs as Easter is coming up, but this can be easily made for any occasion – simply change the color of the frosting and your toppings.
IMPORTANT NOTE: If using chocolate eggs for decoration, put the chocolate eggs near serving time. I noticed that after about an hour or so, the color from the eggs has started to run and drip down to the frosting. Or maybe, select another topping if you would like to finish your cupcakes ahead of time.
This post may contain affiliate links for your convenience. For more information, see my full disclosure policy.
What You Need:
- mini cupcake or muffin pan
- mini cupcake liners
- hand mixer
- Optional: For making the cream cheese-whipped cream frosting, I use my hand blender with whisk attachment ; it’s so convenient for whipping creams and egg whites without the need to use a big stand mixer bowl!)
- piping bag fitted with your choice of piping tip (I used a large round plain piping tip and a Wilton 1M )
- gel food colors (I used Americolor gel paste in lemon yellow and sky blue.)
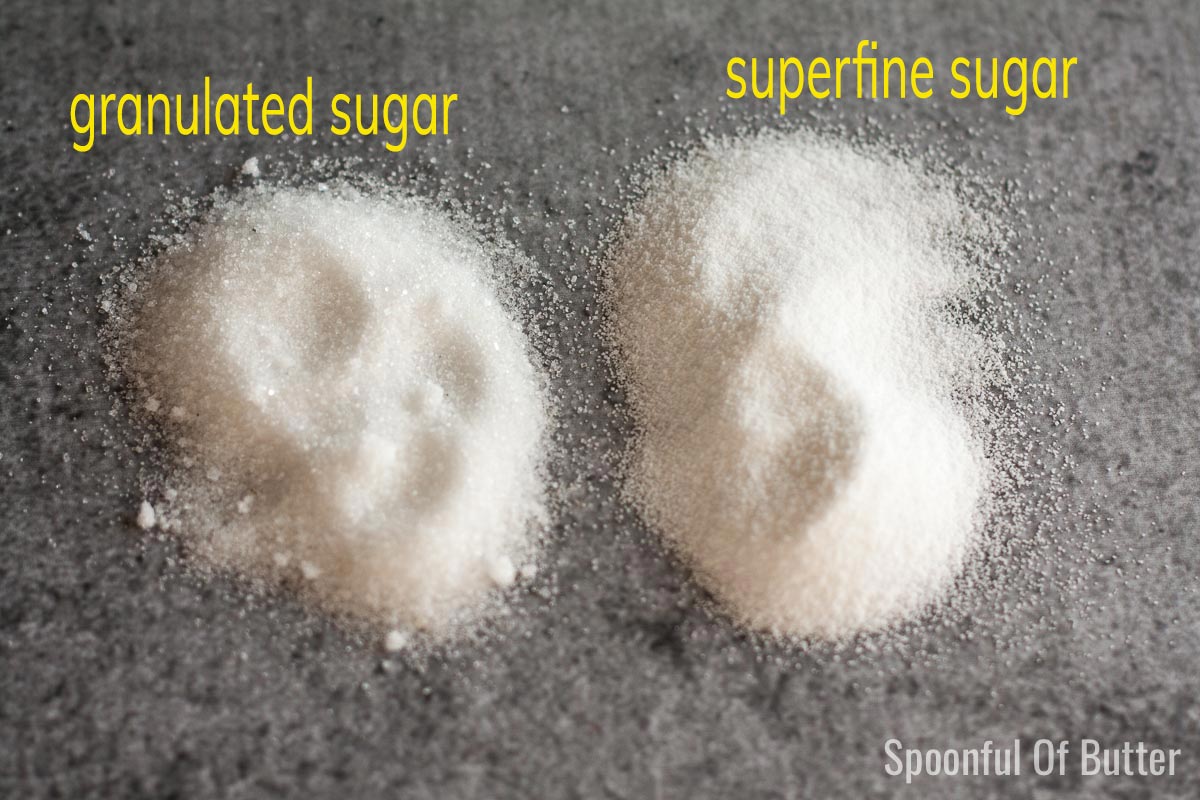
RELATED: How To Make Superfine Sugar

Mini Chocolate Cupcakes With Cream Cheese-Whipped Cream Frosting
Ingredients
Chocolate Cupcakes
- 21 grams 1/4 cup + 1/2 tablespoon unsweetened alkalized cocoa powder (sifted before measuring
- 59 grams 1/4 cup / 59ml boiling water
- 13 grams 1 tablespoon/ 15ml canola oil
- 50 grams 1 large egg, at room temperature
- 22 grams 1 1/2 tablespoons / 23 ml water
- ¾ teaspoon pure vanilla extract
- 83 grams 2/3 cup bleached all-purpose flour
- 100 grams 1/2 cup superfine white sugar or granulated white sugar
- 1 teaspoon baking powder
- 1/16 teaspoon baking soda
- ¼ teaspoon fine salt
- 57 grams 4 tablespoons/ 1/2 stick unsalted butter, at room temperature
For the Cream Cheese-Whipped Cream Frosting
- 80 grams 1/3 cup cold heavy whipping cream
- 200 grams 7 ounces cold, full fat cream cheese, roughly chopped into about 1-inch cubes (I use Philadelphia )
- 2 teaspoons pure vanilla extract
- 65 grams 1/2 cup + 1 tablespoon confectioner's sugar/ icing sugar/ powdered sugar
Instructions
Make the chocolate cupcakes.
- PREPARATION. About 1 hour ahead, boil about 2 cups of water and measure 1/4 cup / 59 grams / 59 ml of it into a heatproof bowl. Immediately mix in the cocoa and whisk together until smooth. Add the oil then cover the container with plastic wrap. Let it cool to room temperature.
- Heat the oven to 350F (175C). Set the oven rack in the middle of the oven.
- MAKE THE BATTER. In a bowl, mix together the egg, water, and vanilla until lightly combined. In another large bowl, mix the flour, sugar, baking powder, baking soda, and salt on low speed (using a hand mixer) for about 30 seconds. Add the butter and cocoa mixture and mix on low speed until the flour mixture is moistened. Change the speed to medium and beat for 1 1/2 minutes. Scrape down the sides of the bowl, as necessary. Reduce the speed to medium-low and add the egg mixture in two parts, beating on medium speed for 30 seconds after each addition to incorporate the ingredients. Scrape down the sides of the bowl again, as necessary.
- FILL AND BAKE. Spoon the batter into the cupcake liners, about 3/4 full. Smooth the tops. For mini cupcakes, bake for 10-11 minutes. For regular size cupcakes, bake for 20-25 minutes, or until a toothpick or wire cake tester inserted into the centers comes out clean. They are cooked when the cupcakes spring back when pressed lightly in the centers.
- COOL THE CUPCAKES. Place the cupcake pan over a wire rack and let it cool for 10 minutes. Then remove the cupcakes from the pan to the wire rack until completely cool. While waiting for them to cool, proceed on making the frosting. (see Note 2)
- STORAGE. These cupcakes stay soft and moist for 2 days at room temperature; 5 days in the fridge, 2 months frozen. (see Note 1 )
Make the Cream Cheese-Whipped Cream Frosting
- Using a hand mixer, whip the heavy cream to soft peaks. Beat in the cream cheese on high speed until combined and fully smooth.
- Add the vanilla and sift half of the confectioner's sugar. Beat on high speed again until fully smooth. Add the remaining confectioner's sugar and beat until smooth.
- If using multiple gel food coloring, divide the frosting into separate bowls. Add a few drops of food color and mix with a rubber spatula until the color is evenly distributed. Do the same for each of the remaining colors.
- TO ASSEMBLE THE CUPCAKES, place the frosting in a piping bag fitted with a piping tip. Further decorate the chocolate cupcakes as you like using sprinkles, toppings, etc.