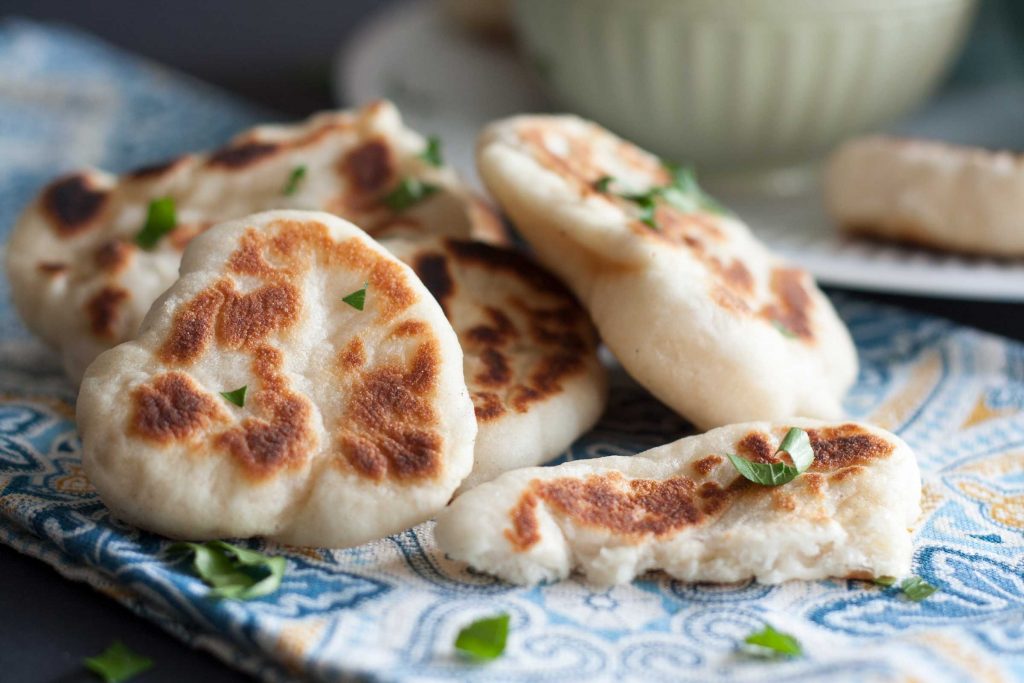
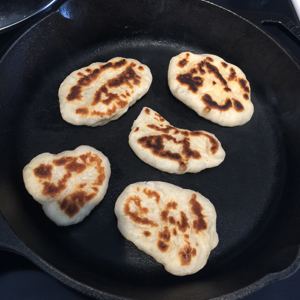
Soft and chewy Naan Dippers. The yogurt in the dough makes these bread flavorful. See those air pockets and char? Yes, they’re quite awesome, especially with your favorite curry and dip.

What is a naan
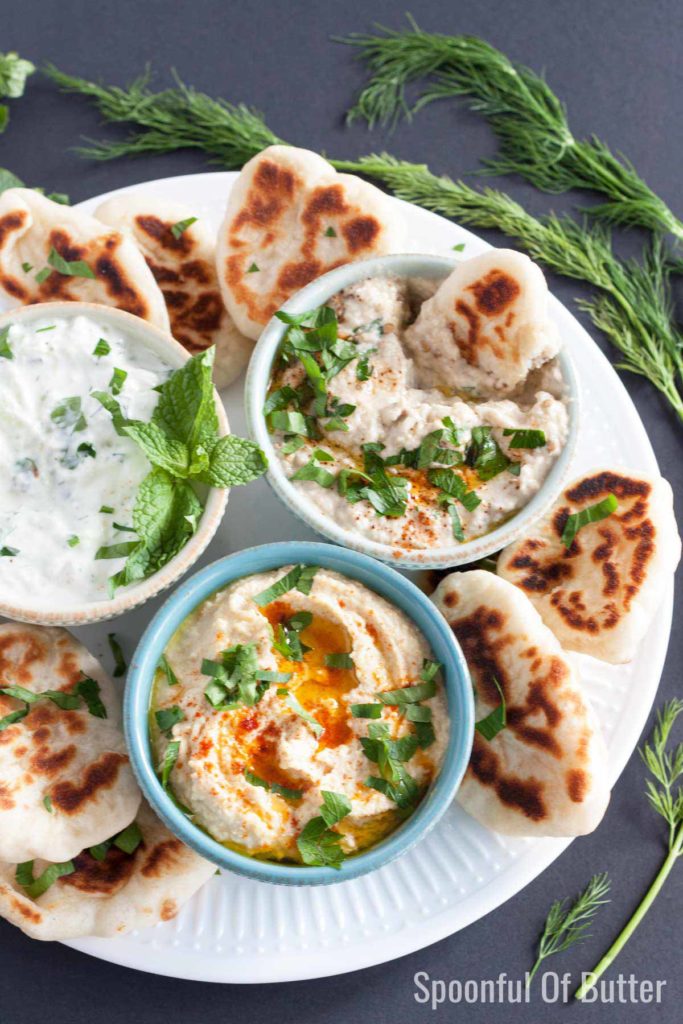
Naan is a yeast-leavened bread that is usually served alongside curries, soups, and dips. I personally love these with a good homemade hummus, baba ganoush, and tzatziki, but this definitely goes well with any other dips too.
The addition of yogurt gives it a distinct flavor and texture. Yogurt inhibits gluten development; that is why this bread doesn’t rise during cooking.
The key to making naan
Naan is traditionally baked in a Tandoor, a clay oven which is way hotter than home ovens.
Instead of baking, griddle them in a (very hot) cast iron pan. It should cook quickly, about 1 minute per side, but again it depends on how hot your skillet is.
If you see that your bread is burning too quickly (which happened to me several times), adjust the heat accordingly.

What do I need to make these naan dippers?
Almost all the ingredients are staples so maybe you have most of them in your kitchen right now:
- granulated sugar
- active dry yeast
- fresh milk
- Greek yogurt
- all-purpose flour
- salt
- baking powder
- baking soda
- butter
How to make naan dippers
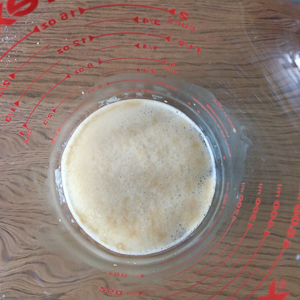
Step 1. Activate the yeast.
In a small bowl, dissolve the sugar in warm water. Add the active dry yeast to the warm water and stir until yeast is dissolved. Let it sit for 15 minutes or until the mixture begins to froth.
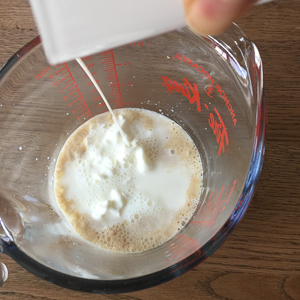
Step 2. Prepare the wet ingredients.
When the yeast is foamy, add the milk and yogurt. Stir until combined.
Step 3. Make the bread dough.
In a large mixing bowl, combine the flour, salt, baking powder, baking soda. Pour the wet ingredients into the flour mixture and mix using a wooden spatula. When the dough is about to come together, use your hands to finish the mixing. Stop kneading as soon as it comes together and you can form a ball. The dough should be soft and sticky.
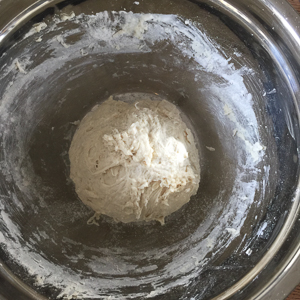
Step 4. Proof the dough.
Cover the dough with a plastic wrap or damp towel and let it sit in a warm place for about 1 hour or until it has increased in size.

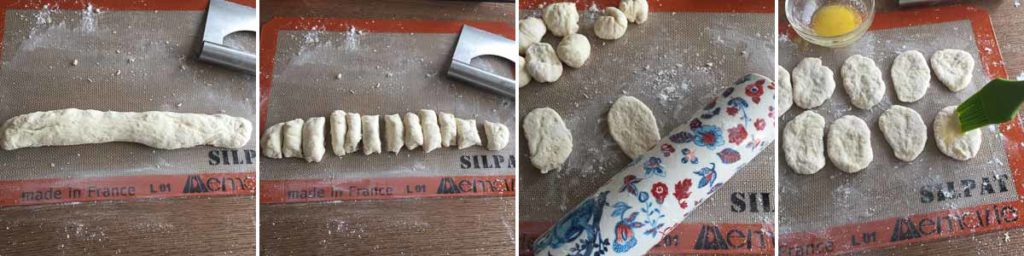
Step 5. Divide and shape the dough.
When the dough is ready, divide it into 24 balls. To do this, roll the dough into a log shape. Cut it in half then put the other half aside. Work on the first half first by rolling it again into a log shape, then divide it into 12 balls using a bench scraper or a pastry scraper. Do the same thing for the remaining half of the dough. Using a rolling pin, roll each piece of dough into a small and thin oval shape. Repeat this method with the rest of the dough.
Step 6. Griddle and serve.
Warm a cast iron skillet over medium-high heat. Brush both sides of naan with melted butter before placing it on the skillet and cooking it for about 45 seconds each side or until you see bubbles starting to form. Flip and cook for another 45 seconds. Adjust the heat if you notice that your naan is getting burnt spots.
Place the naan dippers in a tea towel-lined dish. Best eaten when warm!

Naan Dippers
Ingredients
- 1.5 teaspoon granulated white sugar
- 30 ml hot water not boiling ((about 150 degree F))
- ½ teaspoon active dry yeast
- 90 ml warm milk
- ½ cup 120 grams greek yogurt
- 2 cups 250 grams all-purpose flour
- ⅛ teaspoon salt
- ¾ teaspoon baking powder
- ½ teaspoon baking soda
- melted butter for brushing
Instructions
- ACTIVATE THE YEAST. In a small bowl, dissolve the sugar in warm water. Add the active dry yeast to the warm water and stir until yeast is dissolved. Let it sit for 15 minutes or until the mixture begins to froth.
- PREPARE THE WET INGREDIENTS. When the yeast is foamy, add the milk and yogurt. Stir until combined.
- MAKE THE BREAD DOUGH. In a large mixing bowl, combine the flour, salt, baking powder, baking soda. Pour the wet ingredients into the flour mixture and mix using a wooden spatula. When the dough is about to come together, use your hands to finish the mixing. Stop kneading as soon as it comes together and you can form a ball. The dough should be soft and sticky.
- PROOF THE DOUGH. Cover the dough with a plastic wrap or damp towel and let it sit in a warm place for about 1 hour or until it has increased in size.
- DIVIDE AND SHAPE THE DOUGH. When the dough is ready, divide it into 24 balls. To do this, roll the dough into a log shape. Cut it in half then put the other half aside. Work on the first half first by rolling it again into a log shape, then divide it into 12 balls using a bench scraper or a pastry scraper. Do the same thing for the remaining half of the dough. Using a rolling pin, roll each piece of dough into a small and thin oval shape. Repeat this method with the rest of the dough.
- GRIDDLE AND SERVE. Warm a cast iron skillet over medium-high heat. Brush both sides of naan with melted butter before placing it on the skillet and cooking it for about 45 seconds each side or until you see bubbles starting to form. Flip and cook for another 45 seconds. Adjust the heat if you notice that your naan is getting burnt spots. Place the naan dippers in a tea towel-lined dish. Best eaten when warm!